A bright, confident smile can change how you feel when you walk into a room. You have probably seen the dramatic before-and-after photos. You may have wondered what actually happens during a professional whitening session and how it gets recorded in your patient file. Every procedure in a dental office has a specific code, and in-office whitening is no exception.
Understanding the dental code for in office whitening gives you power. It helps you read your treatment plan, talk to your insurance company, and budget for the smile you want. This guide walks you through everything you need to know. We will cover the specific code, what the procedure involves, how much it costs, how it compares to take-home kits, and how to navigate insurance conversations.
We will keep the language clear and straightforward. No confusing jargon. No unrealistic promises. Just honest, practical information to help you make a confident decision.
What Exactly Is In-Office Whitening
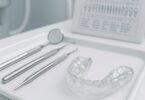
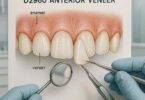
In-office whitening is a professional cosmetic dental procedure. You sit in the dental chair while a trained professional applies a high-concentration bleaching gel to your teeth. The dentist or hygienist carefully protects your gums and soft tissues. They may use a special light or laser to activate the gel. In about 60 to 90 minutes, your teeth can become several shades lighter.
This process differs significantly from the whitening strips or trays you buy at the drugstore. The active ingredient, usually hydrogen peroxide or carbamide peroxide, comes in a much stronger formulation. Because of this strength, a dental professional must supervise the entire process. This supervision protects your enamel and gums from damage.
Patients choose in-office whitening for speed and safety. You get immediate results without weeks of nightly tray use. You also benefit from a customized approach. The dentist assesses your tooth shade, discusses your goals, and adjusts the treatment to minimize sensitivity.
The Official Dental Code for In Office Whitening
The American Dental Association maintains the Code on Dental Procedures and Nomenclature. This standardized system ensures that every dental office uses the same language to describe treatments. For in-office whitening, the official code is D9975.
Let us break down what this code actually means.
Code D9975: External Bleaching for Teeth, Per Arch, In-Office
Code D9975 falls under the “Adjunctive General Services” category in the CDT code set. Its official descriptor reads: “External bleaching for teeth, per arch, performed in office.”
The key word here is “external.” This means the treatment targets stains on the outer surface of the teeth. Internal bleaching, which treats discoloration inside a tooth after a root canal, uses a different code.
When your dentist submits a claim or gives you a treatment plan, you should see D9975 listed. Often, the treatment plan will show two units of this code. One unit represents the upper arch. The second unit represents the lower arch. Some patients whiten only one arch, but most choose both for a uniform result.
Here is a quick reference table for the code:
| Detail | Description |
|---|---|
| Code | D9975 |
| Full Descriptor | External bleaching for teeth, per arch, performed in office |
| Category | Adjunctive General Services |
| Treatment Type | Cosmetic (not usually covered by insurance) |
| Common Unit Count | 2 (one for upper arch, one for lower arch) |
| Performed By | Dentist or dental hygienist under supervision |
Many patients feel confused when they first see a treatment plan. The code looks like a random string of letters and numbers. Now you know exactly what D9975 represents. You can review your plan with confidence.
Why a Specific Code Matters for Patients
You might wonder why a simple code deserves an entire article. The code matters for several practical reasons.
First, it creates transparency. A standardized code prevents a dental office from using vague descriptions like “smile brightening service” that could hide the true nature of the treatment. You know exactly what you are paying for.
Second, it streamlines insurance communication. When you call your insurance provider to ask about whitening coverage, the representative will ask for the code. If you say D9975, they can immediately pull up the correct information. You avoid the frustrating back-and-forth that happens when you describe a procedure in layman’s terms.
Third, it helps with record-keeping. If you change dentists or see a specialist, your new provider can look at your history and see exactly what procedures you have had. This continuity of care protects your oral health.
Fourth, the code reinforces the professional nature of the service. In-office whitening is not a spa treatment. It is a documented dental procedure with protocols, risks, and documentation requirements.
“The CDT code exists to serve patients and providers. When everyone speaks the same language, trust grows and mistakes shrink.” — American Dental Association, CDT Code Purpose Statement
Who Performs In-Office Whitening and What Credentials to Look For
A dentist must prescribe and supervise the procedure. In most states, a registered dental hygienist can apply the whitening gel under the dentist’s direction. Some states allow expanded-function dental assistants to assist with the process.
When you research providers, look for these credentials and qualifications:
- A Doctor of Dental Surgery or Doctor of Dental Medicine degree from an accredited program.
- An active state dental license in good standing.
- Membership in professional organizations like the American Academy of Cosmetic Dentistry, which signals a commitment to continuing education in cosmetic procedures.
- Specific training in laser whitening systems, if the office uses a light-activated protocol.
Do not hesitate to ask questions. You can say, “I see you offer in-office whitening. Who will perform the procedure? What training have they completed?” A reputable office will answer openly and with pride.
The Step-by-Step Process of In-Office Whitening
Understanding the flow of the appointment helps calm nerves. Let us walk through the procedure from the moment you sit in the chair to the moment you see your new smile.
Initial Shade Assessment
The process begins with a conversation. The dentist or hygienist asks about your whitening goals and any sensitivity concerns. They use a tooth shade guide, which looks like a small fan of tooth-colored tabs, to record your starting shade. They may take a photograph. This baseline measurement lets you see the objective change at the end of the appointment.
Isolation and Protection
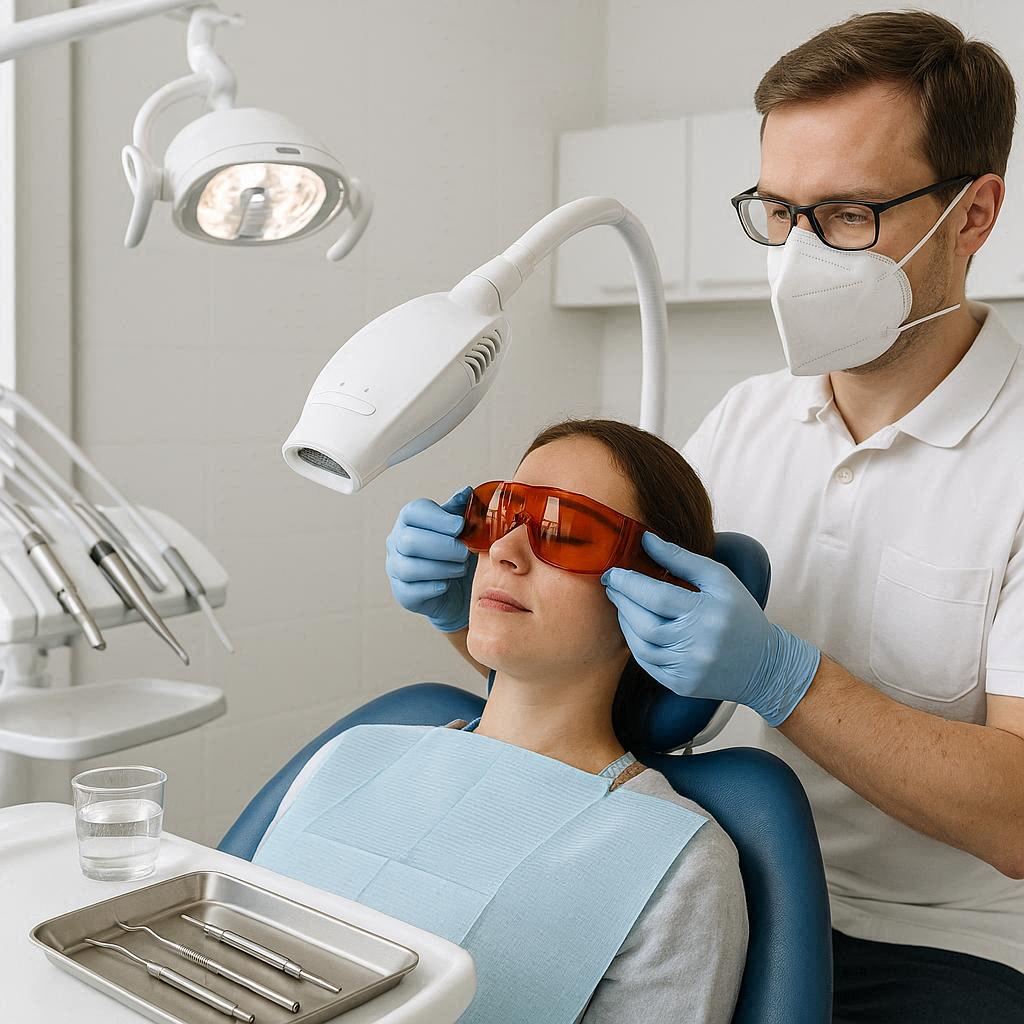
Comfort and safety come first. The team places a cheek retractor to keep your lips and cheeks away from your teeth. They paint a protective gel or place a rubber dam over your gums. This barrier shields the soft tissue from the strong bleaching agent. Some offices use a light-cured material that hardens quickly to create a sealed protective layer.
Application of the Whitening Gel
The dentist or hygienist carefully applies the hydrogen peroxide gel to the front surfaces of your teeth. The concentration typically ranges from 25% to 40% hydrogen peroxide. They work methodically, ensuring even coverage while avoiding contact with the gums.
Activation (Optional, Depending on System)
Many systems use a light, laser, or LED lamp to activate the gel. You may wear protective eyewear. The light shines on your teeth for 15 to 20 minutes. The activation step accelerates the chemical reaction, helping the peroxide break down stains faster. Not all systems require light activation. Some highly effective systems work chemically without a lamp.
Reapplication Cycles
The team removes the gel after the cycle, evaluates the shade change, and applies fresh gel. Most in-office procedures involve two to three cycles. The total chair time is usually 60 to 90 minutes. You can request breaks if your jaw feels tired or if you experience any sensitivity.
Final Rinse and Fluoride Treatment
After the final cycle, the team rinses your teeth thoroughly and removes the gum barrier. They often apply a fluoride treatment or a desensitizing gel to reduce post-treatment sensitivity. They then take a final shade measurement and a photograph. You get to see the immediate results in a mirror.
Comparing In-Office Whitening and Take-Home Trays
Patients often debate between in-office whitening and custom take-home trays. Both are professional treatments. Both use the same basic chemistry. The differences lie in speed, concentration, cost, and convenience.
| Feature | In-Office Whitening (D9975) | Professional Take-Home Trays |
|---|---|---|
| Code | D9975 | D9972 (custom tray fabrication) and D9973 (bleaching gel) |
| Active Ingredient Concentration | 25-40% hydrogen peroxide | 10-22% carbamide peroxide |
| Treatment Time | 60-90 minutes in chair | 1-2 weeks of daily wear (30 min to overnight) |
| Immediate Results | Yes, visible same day | Gradual over days to weeks |
| Supervision | Direct, constant professional supervision | Remote supervision, periodic check-ins |
| Sensitivity Risk | Higher immediate risk, managed in office | Lower per-session risk, cumulative |
| Cost Range | $400 – $1,200+ for both arches | $300 – $600 for trays and gel |
| Longevity | 1-3 years with maintenance | Similar, with touch-up gel availability |
| Best For | Patients wanting instant results | Patients with sensitive teeth or budget preference |
This table makes the trade-offs clear. In-office whitening buys speed. Take-home trays buy flexibility and a lower upfront cost. Many patients combine both approaches. They start with an in-office session for an immediate boost and use take-home trays for maintenance.
Realistic Results: What D9975 Can and Cannot Do
Honesty is essential here. In-office whitening produces dramatic results for many patients. However, it is not magic.
You can expect your teeth to lighten by 3 to 8 shades on the standard guide. The exact outcome depends on the type of stains you have and your natural tooth color. Yellowish stains from surface discoloration tend to respond beautifully. Brown or grayish stains, often caused by certain antibiotics or trauma, resist whitening. In these cases, your dentist may discuss alternatives like veneers or bonding.
Whitening does not change the color of existing fillings, crowns, or veneers. If you have visible dental work, you may need to have it replaced to match your new brighter shade. Your dentist should discuss this before you proceed.
The results fade over time. Coffee, tea, red wine, berries, and tobacco will gradually re-stain your teeth. You can extend your results with good oral hygiene, periodic touch-up treatments, and smart dietary choices. Most patients enjoy their brighter smile for one to three years before considering a repeat treatment.
Cost Breakdown of Dental Code D9975
The cost of in-office whitening varies widely across the United States. Geographic location, provider expertise, and the specific system used all influence the final price.
Average Cost by Region
| Region | Average Cost (Both Arches) |
|---|---|
| Northeast (NY, MA, CT) | $700 – $1,200 |
| West Coast (CA, WA) | $600 – $1,100 |
| Midwest (IL, OH, MI) | $500 – $900 |
| South (TX, FL, GA) | $400 – $800 |
| Rural Areas (Nationwide) | $350 – $600 |
These figures represent the fee for the procedure itself. They may or may not include the examination, cleaning, or fluoride treatment. Always ask for a detailed treatment plan that itemizes every code and fee.
What Influences the Cost
Several factors push the price higher or lower:
- Practice Overhead: A high-end practice in a metropolitan area pays more for rent, staff, and equipment. These costs reflect in the fees.
- Whitening System Brand: Philips Zoom, KöR, and Opalescence Boost are well-known in-office systems. Some require expensive proprietary equipment. The brand influences the per-procedure cost.
- Number of Sessions: Some patients with stubborn stains need a second in-office session. Your plan should clarify if a single fee covers multiple sessions or if each session costs extra.
- Pre-Whitening Services: You may need a cleaning before whitening. A cleaning has its own code and fee.
Important Note: Do not confuse D9975 with D9972 or D9973. D9972 covers the fabrication of custom whitening trays. D9973 covers the take-home bleaching gel. Your treatment plan may include all three codes if you choose a combination approach.
Dental Insurance and D9975: The Reality Check
Let us have an honest conversation about insurance. Most dental insurance plans classify in-office whitening as a cosmetic procedure. Cosmetic procedures are typically not covered. This means you will likely pay the full fee out of pocket.
There are very rare exceptions. If you have a discolored tooth due to a documented injury or a necessary medical treatment, some plans may consider coverage. This requires careful documentation and a letter of medical necessity from your dentist. Do not count on this happening. Treat it as a pleasant surprise if it does.
When you call your insurance company, have the code ready. Ask these specific questions:
- “Does my plan cover procedure code D9975 for external bleaching?”
- “If covered, is there a frequency limitation, such as once every 24 months?”
- “Do I need a pre-treatment estimate or predetermination?”
- “Is this code bundled with any other codes that could trigger a denial?”
Your dental office often does this legwork for you. They submit a pre-treatment estimate on your behalf. However, insurance verification is ultimately your responsibility. No one cares about your money as much as you do.
“I always tell my patients to treat in-office whitening like a luxury investment in themselves, not a medical necessity. Plan to pay out of pocket, and be thrilled if your insurance contributes anything at all.” — Dr. Sarah Chen, Cosmetic Dentist
Finding a Qualified Provider for D9975 Services
Choosing the right dentist for in-office whitening requires some research. Here is a practical checklist:
- Ask for before-and-after photos of their actual patients. Generic stock photos tell you nothing. A dentist who documents their own work takes pride in their results.
- Read online reviews with a critical eye. Look for reviews that mention whitening specifically. Pay attention to comments about sensitivity management and staff professionalism.
- Schedule a consultation before committing. A 15-minute conversation reveals a lot about the practice culture. Do they listen to your concerns? Do they explain the risks honestly?
- Verify that the office uses genuine, FDA-cleared whitening systems. Counterfeit or unapproved products pose serious safety risks.
- Ask about their sensitivity protocol. A good office has a clear plan that includes desensitizing gels, fluoride treatments, and dietary guidance.
Preparation: What to Do Before Your Whitening Appointment
A little preparation makes the experience smoother and the results better.
Get a professional cleaning first. Whitening gel works best on clean enamel. Plaque and tartar create a barrier that prevents even penetration. Most dentists recommend a prophylaxis about one to two weeks before whitening.
Address any active decay or gum disease. Whitening gel can cause severe pain if it contacts a cavity or inflamed gum tissue. Your dentist should examine you and address necessary restorative work before scheduling the whitening.
Use a desensitizing toothpaste for two weeks before the appointment. Toothpastes containing potassium nitrate, such as Sensodyne, help calm nerve sensitivity. This pre-treatment reduces the likelihood of discomfort during and after the procedure.
Stock up on a white diet. You will need to avoid staining foods and drinks for at least 48 hours after treatment. Plan your grocery list. Think plain chicken, white fish, cauliflower, rice, pasta, bananas, and clear beverages. Nothing that would stain a white shirt.
The Recovery Period: Immediate Post-Whitening Care
The 48 hours after your D9975 procedure are critical. Your tooth enamel is temporarily more porous. This means it absorbs stains more easily until the pores re-mineralize and close.
Follow these guidelines strictly:
- Avoid all dark-colored beverages: coffee, tea, red wine, cola, dark juices.
- Avoid dark sauces: soy sauce, tomato sauce, curry, balsamic vinegar.
- Avoid berries, beets, and deeply colored candies.
- Do not smoke or use any tobacco products.
- Use a straw if you must drink something that could stain.
- Rinse your mouth with water immediately after eating or drinking.
- Brush gently with a soft-bristled toothbrush and a non-abrasive toothpaste.
Some sensitivity is normal. It usually peaks in the first 24 hours and fades quickly. Take an over-the-counter anti-inflammatory medication if your dentist approves. Avoid extremely hot or cold foods and drinks. The fluoride or desensitizing gel your dentist applied helps manage this.
Long-Term Maintenance After In-Office Whitening
Your results are an investment. Protect them with smart habits.
Daily Care:
Brush twice daily with a whitening toothpaste approved by the American Dental Association. Floss daily. Rinse with an alcohol-free mouthwash that contains fluoride.
Dietary Awareness:
You do not need to give up coffee forever. But consider rinsing with water immediately after drinking it. Use a straw. Chew sugar-free gum with xylitol to stimulate saliva flow, which naturally cleanses teeth.
Touch-Up Treatments:
Most patients benefit from periodic touch-ups. Your dentist may provide custom take-home trays and a mild bleaching gel. You can use these for a day or two every few months to combat new staining. The codes D9972 and D9973 will apply to this maintenance approach.
Regular Dental Visits:
Keep your six-month checkup and cleaning appointments. Your dental team monitors shade changes and can spot early signs of re-staining. They also polish off surface stains that make your teeth look dull.
Potential Risks and How Ethical Dentists Mitigate Them
Every procedure carries risks. Ethical providers discuss these openly.
Tooth Sensitivity
This is the most common side effect. The peroxide gel temporarily opens microscopic pores in the enamel, exposing the dentin and nerve endings. Most sensitivity resolves within 24 to 72 hours. Dentists mitigate this by using desensitizing agents, adjusting gel concentration, and limiting application time.
Gum Irritation
If the protective barrier leaks, the gum tissue can become temporarily white and irritated. This chemical burn heals quickly, usually within a day or two. Skilled application and careful isolation prevent this in most cases.
Uneven Results
Teeth do not always whiten uniformly. Areas near the gum line or between teeth may appear slightly darker. An experienced dentist anticipates this and adjusts the application technique.
Enamel Damage
With proper professional supervision, permanent enamel damage is extremely rare. Problems arise when people overuse unregulated, high-concentration products at home. The D9975 code represents a controlled, professional environment that prioritizes safety.
Innovations in In-Office Whitening Technology
The field continues to advance. Newer systems aim to reduce sensitivity, shorten treatment time, and improve results.
Lower-Concentration, High-Efficacy Gels:
Some manufacturers now offer formulas with lower hydrogen peroxide levels that achieve comparable results with less sensitivity. The KöR system, for example, uses a continuous refrigeration protocol that preserves the potency of the peroxide, allowing for effective whitening with fewer side effects.
LED Accelerators:
Light-emitting diode technology has largely replaced older ultraviolet and laser systems. LEDs provide gentle, cool activation without heat, reducing the risk of pulp inflammation.
Integrated Desensitizing Agents:
New formulations incorporate amorphous calcium phosphate, nano-hydroxyapatite, or potassium nitrate directly into the gel. These ingredients re-mineralize enamel and block nerve signals during the treatment itself.
Digital Shade Matching:
Instead of the manual shade guide, some offices now use spectrophotometers. These devices produce a digital shade map of each tooth. The analysis removes subjective judgment and provides a precise, measurable before-and-after record.
D9975 and Special Patient Considerations
In-office whitening is not for everyone. Certain groups need special consideration.
Pregnant or Nursing Patients
Most dentists recommend postponing elective cosmetic procedures, including whitening, until after pregnancy and nursing. There is no evidence of harm, but safety studies are ethically impossible to conduct on this population. Err on the side of caution.
Patients Under 16
The American Academy of Pediatric Dentistry advises against whitening for patients with mixed dentition. The pulp chambers in young teeth are larger, increasing sensitivity risk. Wait until all permanent teeth have fully erupted and matured.
Patients with Extensive Restorations
If you have many fillings, crowns, or veneers on your front teeth, whitening may not produce an even result. Your dentist may suggest replacing these restorations after whitening to achieve a uniform shade. This adds significant cost and complexity.
Patients with Tetracycline Staining
Some patients have deep, intrinsic stains from antibiotics taken in childhood. These stains often resist standard in-office whitening. Specialized protocols, such as extended KöR whitening, may help, but results vary. A consultation with a cosmetic dentist experienced in this area is essential.
How to Read Your Dental Bill Featuring D9975
Let us look at a realistic treatment plan and break it down.
Sample Treatment Plan:
- D0150: Comprehensive Oral Evaluation — $75
- D1110: Prophylaxis, Adult — $110
- D9975: External Whitening, Upper Arch — $400
- D9975: External Whitening, Lower Arch — $400
- D1208: Topical Application of Fluoride — $35
Total Patient Investment: $1,020
This plan is transparent. You see the code, the description, and the fee for each service. The whitening itself is $800 for both arches. The cleaning and exam are separate and billed under their own codes. The fluoride application is a small add-on that helps with post-treatment comfort.
If your plan shows only one D9975 when you expect both arches, ask for clarification. You do not want to assume both arches are included and face an unexpected charge.
Common Myths About Dental Code D9975
Let us address some persistent myths.
Myth 1: D9975 is covered by medical insurance under certain conditions.
Reality: Medical insurance rarely, if ever, covers dental whitening. The procedure falls squarely in the cosmetic realm.
Myth 2: The code includes take-home trays automatically.
Reality: D9975 specifically describes the in-office procedure. Take-home trays and gel have separate codes. A truly comprehensive treatment plan may include both, but they must be itemized individually.
Myth 3: You can use D9975 for at-home treatments supervised online.
Reality: Using this code for anything other than a procedure performed entirely within a dental office is fraudulent billing. Teledentistry whitening supervision does not qualify.
Myth 4: A higher fee for D9975 always means better results.
Reality: The skill of the clinician matters more than the fee. A conscientious dentist with a mid-range system can deliver excellent results. An expensive practice can underdeliver. Focus on provider quality, not the price tag.
The Future of Professional Whitening Codes
The CDT code set is updated annually. New codes emerge, old codes are revised, and some are deleted. Could D9975 change in the future?
It is possible. The trend in cosmetic dentistry moves toward more specific coding that captures nuances in technique. We might eventually see separate codes for light-activated versus non-light-activated in-office whitening. Or a code for in-office whitening with integrated desensitizing protocols.
Staying informed helps you remain an empowered consumer. The American Dental Association’s website publishes code changes each year. Your dental office should also communicate any changes that affect your care.
Talking to Your Dentist: A Script for the Conversation
Many patients feel awkward discussing money and codes. Here is a friendly script you can adapt.
“Hi, I am really interested in getting my teeth whitened here. Before I commit, could you walk me through the treatment plan? I would love to see the specific codes you will use. I understand D9975 is the in-office whitening code. Will you also recommend take-home trays for maintenance? If so, what codes and fees should I expect? I want to understand the full investment upfront.”
This approach signals that you are an informed, engaged patient. The dental team will appreciate your directness and respond with clarity.
Selecting the Right Whitening System Under D9975
Not all in-office systems listed under D9975 are the same. Here is a comparative overview of popular professional brands.
| System | Active Ingredient | Light Required? | Average Session Time | Notable Feature |
|---|---|---|---|---|
| Philips Zoom WhiteSpeed | 25% hydrogen peroxide | Yes, LED | 45 minutes | Widely available, strong brand recognition |
| Opalescence Boost | 40% hydrogen peroxide | No, chemical activation | 60 minutes | No light needed, lower equipment cost for office |
| KöR Whitening | Variable, refrigerated gel | Optional | 90+ minutes | Continuous refrigeration maintains potency, excellent for tough stains |
| GLO Science Pro | 24% hydrogen peroxide | Yes, guided light optics | 32 minutes | Closed-system mouthpiece for isolation |
Your dentist will have a preferred system based on their training and experience. Ask them why they chose their specific system. Their answer reveals their commitment to patient outcomes.
Case Examples: Realistic D9975 Outcomes
Understanding average outcomes helps set realistic expectations. These examples illustrate common scenarios.
Case 1: Mild Surface Staining from Coffee
Patient: 28-year-old with mild yellowing, no restorations on front teeth, good oral health.
Treatment: One session, three 15-minute cycles with light-activated gel.
Outcome: Teeth lightened from shade A3 to A1. Patient thrilled with results.
Maintenance: Custom trays provided for touch-ups every 6 months.
Case 2: Moderate Staining with Tetracycline History
Patient: 42-year-old with gray-brown banding, no active decay.
Treatment: Initial in-office session with modest improvement. Patient opted for combined protocol: a second in-office session plus six weeks of nightly take-home gel use.
Outcome: Teeth lightened from C4 to a variable B2-B3. Significant improvement, though not perfectly uniform. Patient satisfied but understood limitations upfront.
Case 3: Sensitivity-Prone Patient
Patient: 35-year-old with history of sensitive teeth, mild staining.
Treatment: Two weeks of desensitizing toothpaste prior. In-office session using low-concentration, non-light-activated gel. Two shorter cycles instead of three longer ones.
Outcome: Minimal sensitivity reported. Teeth lightened from B2 to A1. Patient elected to use desensitizing take-home gel for future touch-ups.
These cases show that the D9975 code covers a range of real-world applications. Communication and customization make the difference between a good outcome and a disappointing one.
How Office Environment Affects D9975 Execution
The physical environment matters. A clean, organized, and modern office reflects a commitment to quality. When you visit for a consultation, observe these details:
- The dental chair and surrounding area appear spotless.
- Instruments are sealed in sterilization pouches.
- The team wears appropriate personal protective equipment.
- The whitening gel comes from a sealed, single-use package, not a large, unmarked container.
- The staff can clearly explain what brand and concentration of gel they use.
These signs indicate a practice that respects infection control and patient safety. The D9975 code should represent a premium experience, not just a chemical application.
Understanding the Relationship Between D9975 and Other Codes
Your whitening journey may involve multiple related codes. Knowing them helps you understand your comprehensive treatment plan.
| Code | Description | Relationship to D9975 |
|---|---|---|
| D9972 | External bleaching per arch, custom tray fabrication | Used for take-home trays, often a complement to D9975 |
| D9973 | External bleaching per arch, take-home gel | The gel supplied for maintenance after in-office treatment |
| D9974 | Internal bleaching per tooth | For a single darkened tooth after root canal treatment |
| D9975 | External bleaching per arch, in-office | The focus of this article |
| D1110 | Prophylaxis, adult | Cleaning recommended before whitening |
| D1208 | Topical fluoride application | Often applied post-whitening for sensitivity |
This context prevents confusion when your treatment plan arrives.
The Psychology of a Whiter Smile
Why do we invest in whitening? The impact goes deeper than aesthetics. A brighter smile often boosts self-perception and social confidence. People who feel good about their smile smile more often. This positivity affects personal relationships and professional interactions.
This psychological benefit explains the enduring popularity of D9975 services. However, anchoring your self-worth to a tooth shade is not healthy. View whitening as an enhancement, not a fix for deeper self-image issues. A skilled cosmetic dentist will discuss your motivations and help you set realistic expectations that honor your overall well-being.
Environmental and Safety Considerations
Reputable offices handle whitening waste responsibly. The gel, barriers, and used applicators should go into appropriate waste streams. The light equipment should be maintained and tested regularly.
For your safety, the office should document the gel lot number and expiration date in your chart. This step ensures traceability if a product recall ever occurs. You are unlikely to need this information, but its presence indicates a meticulous practice.
Questions to Ask During Your Whitening Consultation
Arrive prepared. Here are questions that generate useful information:
- What shade am I starting at, and what shade can I realistically achieve?
- Which whitening system do you use, and why did you choose it?
- What is the concentration of hydrogen peroxide in the gel?
- How do you isolate my gums to prevent irritation?
- What is your protocol for managing sensitivity during and after treatment?
- May I see before-and-after photos of your patients with similar starting shades?
- Will you use a light or laser? Is there evidence it improves results with your system?
- How many cycles do you typically perform, and what determines the number?
- What is the total fee for D9975 for both arches, including any associated codes?
- Do you offer a satisfaction guarantee or a touch-up policy if results fall short?
A dentist who welcomes these questions demonstrates professionalism and respect for your autonomy.
Frequently Asked Questions
Is D9975 the only code for whitening?
No. D9972 covers custom tray fabrication for take-home whitening. D9973 covers the take-home bleaching gel. D9974 covers internal bleaching for a single tooth. D9975 is specific to in-office external whitening.
Will my insurance pay for D9975?
In almost all cases, no. Dental insurance considers in-office whitening a cosmetic procedure and excludes it from coverage. You should plan to pay the full fee yourself.
How many units of D9975 will I see on my bill?
You will typically see two units. One unit represents the upper arch, and the second represents the lower arch. The fee per arch varies by practice.
Does D9975 include the cleaning I need before whitening?
No. The cleaning is a separate procedure with its own code, usually D1110 for an adult prophylaxis. Your treatment plan will list each service and its associated code.
Can my dentist use D9975 if I only whiten one arch?
Yes. The code is “per arch.” If you only treat your upper teeth, your bill will show one unit of D9975.
How long do the results from a D9975 procedure last?
Results typically last between one and three years. Your diet, oral hygiene habits, and tobacco use significantly impact longevity. Periodic touch-ups with take-home gel help maintain brightness.
Is there any medical reason a dentist would bill D9975 to medical insurance?
Extremely rarely. If a tooth discolored due to a documented traumatic injury or a necessary medication, a medical insurance plan might cover whitening to restore normal appearance. This requires extensive documentation and is the exception, not the rule.
What happens if I swallow some whitening gel?
The dentist isolates your teeth and uses suction to remove excess gel. Swallowing a small amount is unlikely to cause harm, but the team works to prevent it. Report any irritation immediately.
Conclusion
The dental code for in office whitening is D9975, which represents a professional, in-office external bleaching procedure per arch. Understanding this code helps patients read treatment plans, communicate with insurers, and make informed decisions about investing in a brighter smile. While insurance rarely covers this cosmetic service, the speed, safety, and dramatic results of a professionally supervised treatment offer lasting value that many patients find worthwhile.
Additional Resource
For authoritative information on dental procedure codes, visit the American Dental Association’s CDT Code page: https://www.ada.org/publications/cdt. This resource provides official code descriptions and updates.
Disclaimer: This article provides educational information about the dental code for in office whitening. It does not constitute dental, medical, or financial advice. Consult a licensed dentist for personalized recommendations and your insurance provider for coverage details. Treatment costs, insurance policies, and dental codes may change over time. Always verify current information with a qualified professional.